In our house we are tracking the Olympics with a simple chart that I made from poster board and 2" by 2" red and blue squares. Check it out!
"GO USA" was cut from white cardstock using the Cricut, then I hand drew stars and strips on them. I added some bling to the stars and stripes with stickles. (My 7 year old daughter is CRAZY about stickles!)
We are tracking only the medals that we watch the USA win. So far, USA has won 17 medals, but we only have 15 on our chart. The goal is to encourage the kids to take an interest in the Olympics! So when they see the USA win, they get to add a sticker to the chart. To up the ante... we've given them a money incentive, too. Each gold medal on our chart is worth 25 cents, each silver 10 cents, and each bronze is 5 cents. The stars may have been enough incentive, but adding money to it has really gotten them interested in watching the USA at the Olympics!
We are using stars to represent the medals - gold, solver and white (bronze). We purchased these in the kids craft area at Walmart.
Happy craftin' and GO USA!
Search This Blog
Tuesday, July 31, 2012
Tuesday, July 17, 2012
Countdown Craft
I saw an idea for this years ago and finally got around to making one to coutdown for an upcoming trip we have planned! The kids can't wait to start using it!
What is really great about this Countdown Calendar is that it is 100% reusable!
The flowers were cut with a Cricut, then I punched circles for the centers and used number stickers to label them. The flowers are stuck onto green drinking straws with glue dots then a small strip of tape on the back for reinforcement. The leaves (cut with cricut) are also attached with a glue dot.
The "vase" is a large Bush's baked beans can that I wrapped with decorative paper and stuffed with handmade "grass". The grass is made from thin strips of green paper that we (me and the kids!) accordian folded.
I made 21 flowers... So the countdown will begin three weeks before the event.
We'll remove one flower a day - starting with 21, then 20, then 19... until they are all removed. Then it will be time for our vacation!
Since it's reusable, for the next vacation (or birthday or beginning of school...), just reload the can and start the countdown all over again!
Happy craftin'!
Saturday, June 9, 2012
Little Brother
This is a picture of my kids from 2007... Oh the Memories!
Carter was only 3 months old and Allison is in her terrible two's! She was SO uncooperative that day that I am amazed we got this cute picture!
I scrapbook the "professional pictures" of the kids in an album separate from our regular family album. When I scraped this, I had a new paper tearing tool and my Cricut was new, too! I used the tearing tool to tear the patterned paper and add just a little bit of texture.
My favorite part of this layout (beside the adorable kids!) is the striped letters! I cut thin strips from various scraps of blue paper and stuck them to a thin sheet of velum. I lined them up right next to each other and used a Zyron sticker maker to make sure they were stuck down really well! Then I ran the striped sheet of velum through my cricut! I really LOVE how it turned out! And it was fun to make!
Hope this inspipres you to make somthing great!
Happy scrappin'!
Friday, May 11, 2012
Hands, Ears, and Feet
A year or two ago I saw this layout in a Creating Keepsakes magazine and I fell in with it. The close-ups of each little baby part... lashes, curls, toes, ears... So sweet.
So, I set out to create my own version.
One day the kids were playing in the backyard in grass that was WAY overdue for a mow. I was taking a couple pictures and decided to try to get some of those cute parts... hands, feet, ears. Then, in a style similar to the layout above, I put them all together.
I love the pictures in the tall grass! And I am happy with how this layout turned out!
Happy Scrappin'!
Thursday, May 3, 2012
Grand Canyon Vacation
In May 2010 we took a weekend trip from our home near Phoenix to the Grand Canyon. We had moved to Arizona in 2007, so in 2010 we thought it was about time we saw the biggest attraction in our state!
It turned out to be a scenic, fun, exhausting, amazing vacation. And it was the start of our passion for weekend mini-vacations to National Parks.
It's taken me two years to get to it but I finally finished scrapbooking this little adventure! Check out my pages, below.
SUNSET CRATER VOLCANO
National Monument
Our first stop was at Sunset Crater Volcano, a volcano that erupted about 1000 years ago and completely transformed the landscape of that area. It left behind incredible colors and beautiful volcanic rocks.
Love, love, LOVE this layout! This is a page kit from Mosaic Moments by Tami Potter. Their page kits are wonderful...everything is precut and they are super easy to assemble. And you end up with gorgeous pages like this!! When I saw this kit, I knew it would be perfect for my Sunset Crater pictures - I like the oranges and browns with the orange and brown "cinders" on the volcano.
Can you see the glitter?
How do you add a title that is as WOW! as the pictures but without distracting from the pictures? My latest passion is glitter titles!! I cut them with my Cricut - although I have to slow the cutting speed and increase the pressure of the blade to cut all the way through the paper.
WUPATKI
National Monumant
Our second stop on this trip was Wupatki National Monument - an Indian pueblo ruin. Really, really interesting!
This layout is also from Mosaic Moments. It was a class kit from the 2011 CKC Convention In Mesa. Mosaic Moments makes it easy to fit a lot of pictures in a two-page layout - and you'll find that a lot of my pages are influenced by the Mosaic Moments style even if I am not using their grid paper.
GRAND CANYON
National Park
We finally made it to the Grand Canyon. It was breath-taking.
At least a year before we made our trip to the Grand Canyon, I bought some scrapbook paper that had the Grand Canyon logo on it. I knew I'd need it some day! So, when I sat down to do this layout I started with the Grand Canyon paper... Then I looked at the 25+ pictures I wanted to fit into this two page spread. In the end, I wanted to show the picture of us at the Grand Canyon. Sure, we took a lot of scenic pictures - but none of them can match the beauty of the canyon in real-life. So I decided to use mostly pictures that showed people and some of the memories that we made there.
I managed to fit 12 pictures in this two page spread. I cut out the Grand Canyon logo from my cherished Grand Canyon paper and then tore a picture of it and layered it on the left side. The right side was the back of my Grand canyon paper (the side without a logo) with a big square of brown layered on tope of it. I used a simple grid pattern on the right side.
The journaling on the right side is one of my favorites... I used www.wordle.net. I LOVE how it turned out!
SLIDE ROCK
State Park
Our last stop on our trip... Beautiful Slide Rock State Park. It was too cold to swim, but not too cold to dip our feet in the creek.
I used my Mosaic Moments grid paper and Stampin Up! paper. (I love Stampin' Up!. Great quality and it all coordinates so well!!)
It turned out to be a scenic, fun, exhausting, amazing vacation. And it was the start of our passion for weekend mini-vacations to National Parks.
It's taken me two years to get to it but I finally finished scrapbooking this little adventure! Check out my pages, below.
SUNSET CRATER VOLCANO
National Monument
Our first stop was at Sunset Crater Volcano, a volcano that erupted about 1000 years ago and completely transformed the landscape of that area. It left behind incredible colors and beautiful volcanic rocks.
Love, love, LOVE this layout! This is a page kit from Mosaic Moments by Tami Potter. Their page kits are wonderful...everything is precut and they are super easy to assemble. And you end up with gorgeous pages like this!! When I saw this kit, I knew it would be perfect for my Sunset Crater pictures - I like the oranges and browns with the orange and brown "cinders" on the volcano.
Can you see the glitter?
How do you add a title that is as WOW! as the pictures but without distracting from the pictures? My latest passion is glitter titles!! I cut them with my Cricut - although I have to slow the cutting speed and increase the pressure of the blade to cut all the way through the paper.
National Monumant
Our second stop on this trip was Wupatki National Monument - an Indian pueblo ruin. Really, really interesting!
This layout is also from Mosaic Moments. It was a class kit from the 2011 CKC Convention In Mesa. Mosaic Moments makes it easy to fit a lot of pictures in a two-page layout - and you'll find that a lot of my pages are influenced by the Mosaic Moments style even if I am not using their grid paper.
GRAND CANYON
National Park
We finally made it to the Grand Canyon. It was breath-taking.
At least a year before we made our trip to the Grand Canyon, I bought some scrapbook paper that had the Grand Canyon logo on it. I knew I'd need it some day! So, when I sat down to do this layout I started with the Grand Canyon paper... Then I looked at the 25+ pictures I wanted to fit into this two page spread. In the end, I wanted to show the picture of us at the Grand Canyon. Sure, we took a lot of scenic pictures - but none of them can match the beauty of the canyon in real-life. So I decided to use mostly pictures that showed people and some of the memories that we made there.
I managed to fit 12 pictures in this two page spread. I cut out the Grand Canyon logo from my cherished Grand Canyon paper and then tore a picture of it and layered it on the left side. The right side was the back of my Grand canyon paper (the side without a logo) with a big square of brown layered on tope of it. I used a simple grid pattern on the right side.
The journaling on the right side is one of my favorites... I used www.wordle.net. I LOVE how it turned out!
SLIDE ROCK
State Park
Our last stop on our trip... Beautiful Slide Rock State Park. It was too cold to swim, but not too cold to dip our feet in the creek.
I used my Mosaic Moments grid paper and Stampin Up! paper. (I love Stampin' Up!. Great quality and it all coordinates so well!!)
And with that, we made it back to our home. Awesome vacation. I had a blast scrapbooking it (even though it took me TWO years!) I hope ya'll enjoyed it, too!
Happy scrappin'.
Tuesday, May 1, 2012
Less is More
Oh my! It looks like it's been almost a year since my last post here. Well, this creative mamma took on a job as a part time math teacher at a community college. It's been keeping me busy! Too busy to scrapbook most of the time. But, after a year of teaching, I feel like I have settled into a routine and I have been scrapbooking like crazy since January!
But, to be clear, I should define what I mean by "like crazy"...
When I say, "like crazy", that means I am completing 2-6 pages per month. (That's only 1-3 2-page layouts.)
Yep. That's all.
I have never tried to scrapbook ALL the pictures I take. I don't even scrapbook most of them. Rather, I like to scrapbook some of my very favorite moments...
I remember as a kid and teenager looking at other peoples vaction pictures and sometimes being very bored. Then one time, some friends showed me a video of their adventure through the Badlands, Mount Rushmore, Yosemite, etc. It was wonderful and captivating... Can you guess why? They'd forgotten to take the battery charger for their video camera! So they had to conserve the battery by only shooting a minute or so at each place!
That's when I realized... Less is More.
I scrapbook the memories that I want my kids to have forever. I'm not a fast scrapbooker, but there is a lot of love put into each page!
New posts of my latest pages coming very soon!
But, to be clear, I should define what I mean by "like crazy"...
When I say, "like crazy", that means I am completing 2-6 pages per month. (That's only 1-3 2-page layouts.)
Yep. That's all.
I have never tried to scrapbook ALL the pictures I take. I don't even scrapbook most of them. Rather, I like to scrapbook some of my very favorite moments...
I remember as a kid and teenager looking at other peoples vaction pictures and sometimes being very bored. Then one time, some friends showed me a video of their adventure through the Badlands, Mount Rushmore, Yosemite, etc. It was wonderful and captivating... Can you guess why? They'd forgotten to take the battery charger for their video camera! So they had to conserve the battery by only shooting a minute or so at each place!
That's when I realized... Less is More.
I scrapbook the memories that I want my kids to have forever. I'm not a fast scrapbooker, but there is a lot of love put into each page!
New posts of my latest pages coming very soon!
Tuesday, May 3, 2011
First Communion Card
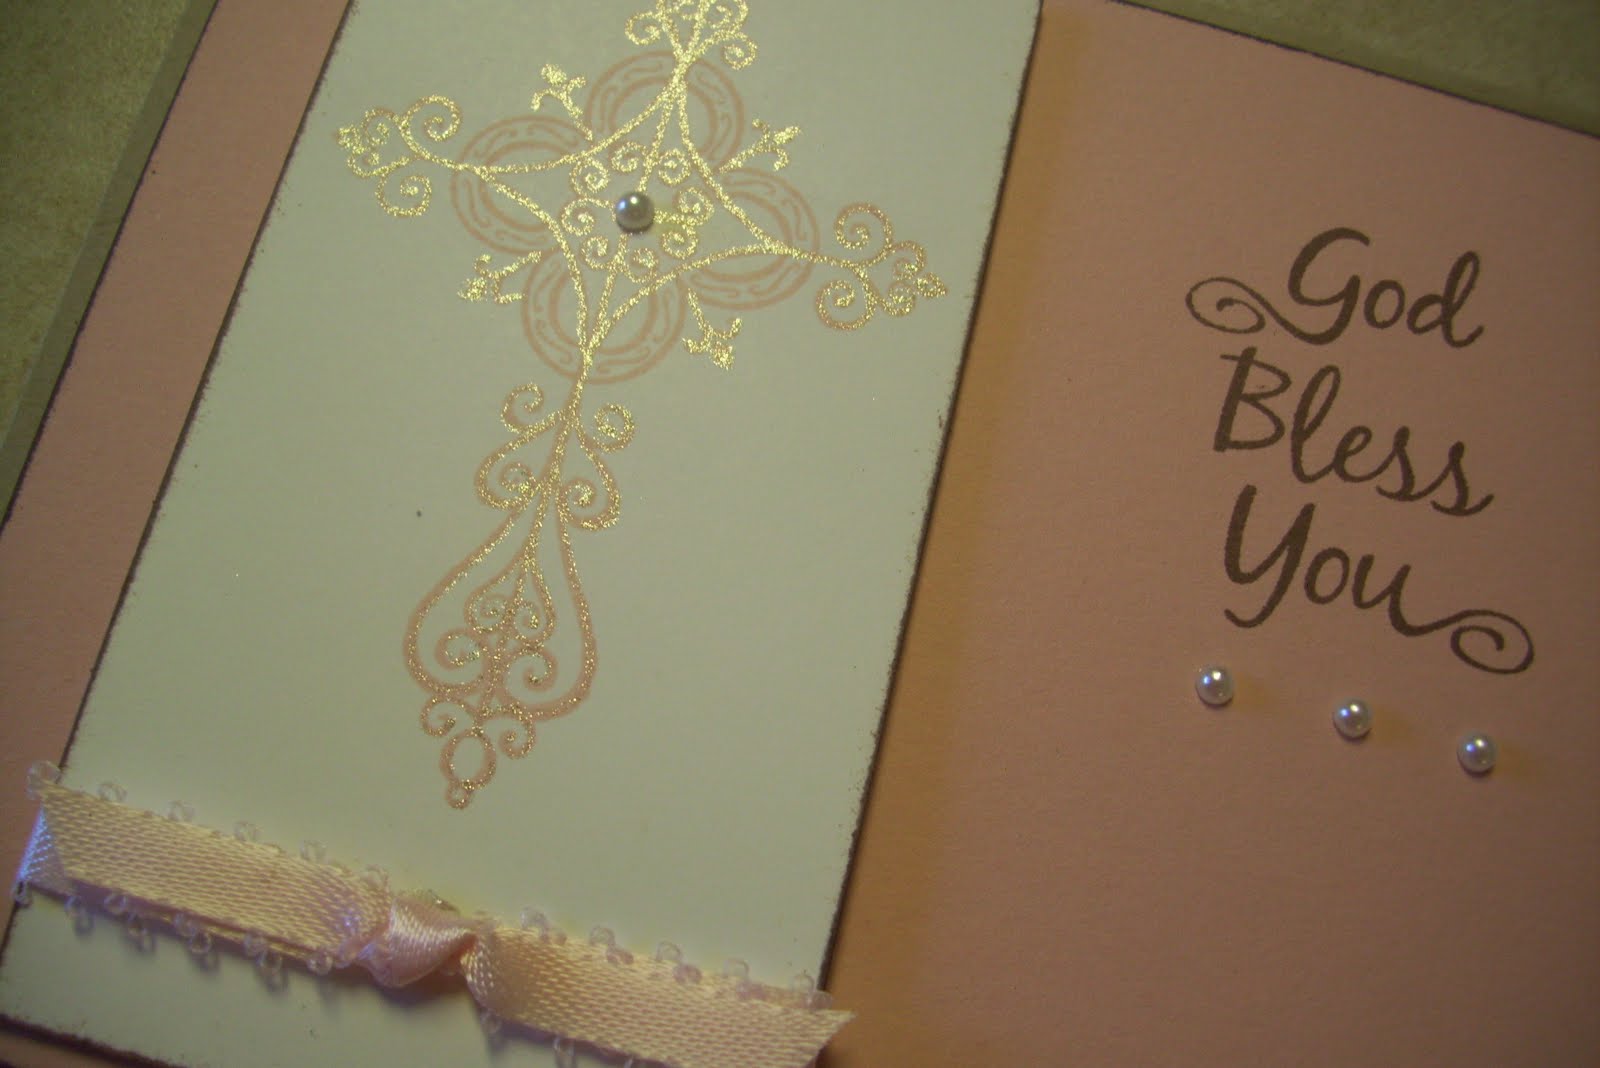
I made these this morning to mail along with the First Communion gifts for my neice, Kelly, and goddaughter, Kaitlyn. I almost ran out of time to get these done, and I thought of just buying the cards... but I really wanted to make them!
What I especially love on these cards are the tiny pearl embelishments. So cute and I think they really add a finishing touch!
Thanks to Margaret for the inspiration for these!
Happy Stampin'!
Thanks to Margaret for the inspiration for these!
Happy Stampin'!
Tuesday, December 14, 2010
Note Cards
I made these note cards for a gift for my mother-in-law for her birthday. I wanted to give her something useful and heartfelt...and something I really thought she'd like. I was having a hard time coming up with an idea and then I remembered some adorable note cards that my friend Jackie from Stampin' Up! made a few weeks ago. Working with her idea as my inspiration, I used the Water Trio stamp set, Stamp n Write pens to add multiple colors to one stamp, and some bright colored cardstock.
And here they are...
Look carefully and you will see the darker tips on the flowers in the stamped image on the right. Using the Stamp n Write markers, I colored the flower with blue, then went back over the tips with a darker color (a dark purple). I love the effect!!
I did the same two-tone effect on these - the tips of the flowers are a darker color.
The finished product packaged and ready to give as a gift!
Happy stampin'!
Calendar Scrapbook
When my daughter was born, a friend gave me a baby calendar for her... I LOVED it. I made notes on the calendar of her developmental milestone and there was a space to add a picture each month. --But who can add just ONE picture a month? I would trim my favorite pictures and arrange them to get as many as I could on the page for each month.
But to my dismay... it was only a 12 month calendar! What's up with that? It didn't even have 13 months so I could add pictures of her first birthday. And she wasn't walking, yet, so where would I note that milestone?! What's a mom to do?
SCRAPBOOK!
I bought a scrapbook coverset and calendar pages from my Creative Memories friend and made my own calendar! I added milestone notes on the right page and pictures on the left.
Two years later, I did the same thing for my son. I used a premade baby calendar for the first year and then scrapbooked his second year with calendar pages from Creative Memories.
The calendar scrapbooks are still some of my favorite projects!!
This year I bought this 2011 Basic Grey Calendar Kit:
I plan on making notes on it of some of the fun (or funny) things we do in 2011. Then I'll add a picture (or two, or three...) and at the end of the year I'll cut the pages out of the calendar and put them in an 8X8 album.
Happy Scrappin'!
Monday, October 18, 2010
Spiderweb Table Runner
I made this adorable table runner out of felt this weekend. Thanks to my friends at Crafty Owls for the kit!
Want to make your own? Find directions here.
Happy Halloween crafting!
Want to make your own? Find directions here.
Happy Halloween crafting!
Monday, September 27, 2010
Clip It Up
Have ya'll seen this nifty organization masterpiece called the Clip It Up? I just discovered it today! Too cool! I must add this to my Christmas list!
Also, if you go to this link and add a comment you will be entered to win one of these awesome do-dads for yourself!
Happy Organization!
Also, if you go to this link and add a comment you will be entered to win one of these awesome do-dads for yourself!
Happy Organization!
Friday, September 10, 2010
Little Brother
This is one of my very favorite layouts. I love the torn pattern paper in the background - and I really love how I made the letters "L" and "B"! Inspired by a striped letter sticker I had (that wasn't the right letter or the right color for this layout), I decided to creat my own! I cut thin strip of coordinating paper then ran it through my Xyron and adheared it to a thin sheet of vellum. I made about a 3"X4" sheet of this striped paper. Then I put it in my Cricut to cut the letters I needed. I love the effect!
Happy Scrappin'!
Thursday, September 9, 2010
A visit to Nana & Pop's house is always fun, but on this particular visit, Pop surprised the kids with Big Wheels!! The kids has so much fun riding them, and we took so many pictures, that I knew this would have to be a 2-page layout. --But even then, how would I fit it all on just two pages?
On this layout I used coordinating paper from The Paper Loft. Using a solid background, I accented the page with stripes of patterned paper and the added a couple circles using dimensional adhesive. The title in the center was made using the Cricut Cuttin' Up cartridge. This simple layout left a lot of room for my pictures!
Happy Scrappin'!
Programs and Party Favors
For my MOMS group, I often volunteer to make prayer cards or book marks, or in this case, the programs and favors for our annual anniversary celebration.
For this project I had a limited budget... so I bought a pad of 12"X12" coordinating paper and kept it simple! Each program was 6"X6" so I could get 4 programs from each 12"X12" sheet of scrapbook paper. I printed the programs on regular printer paper and used my CM tearing tool to tear all the edges. (The light weight printer paper made this easier than tearing card stock!) I matched the ink color to the background paper.
For the favors, we bought Rosary CD's. I cut my 12"X12" paper into two 5"X12" stripe and two 1"X12" strips to make the "belt". I wrapped the 5"X12" paper around the CD, creased it, and added the belt and a coordinating flower embellishment.
Simple. Pretty.
Happy crafting!
Saturday, September 4, 2010
Portrait Album
For each of my kids, I have a "Portrait Album". I put all their studio or professional pictures in this album. Each album has a "cover" page. This is the cover page for Carter's portrait album.
I used the Cricut cartridges Mini Monograms and Opposites Attract to create the titles.
Happy scrappin'!
Garden
I am so proud of the little garden we have in our backyard - forget the fact that I don't have a green thumb. One year after my first attempt to grow something, we finally harvested our first crop of carrots! I was so happy I took a bunch of pictures!
Happy scrappin'!
A Mother's Notebook
This is a regular composition book that can be found at any office supply store. It's been covered with scrapbook paper to dress it up, personalize it, and make it pretty!
TIPS & TRICKS
- Cut your paper about 1" larger than the area that you are covering. Fold the excess over the edges of the front cover and adhear to the inside front cover.
- Cut another solid color paper slightly smaller than the area that you want to cover and adhear it OVER the folded over edges from step 1. This will keep the front cover very neat and tidy and the inside will also finished.
- Cut a 2" to 4" strip from contrasting paper to adhear to the left edge of the cover. This keeps to edge of your decorative paper neater and makes the overall look more finished.
This Mother's Notebook idea is credited to the amazing, sweet, and all around fabulous Carla Reeves of Sanity Journals. Carla led an journaling event with this concept and I must confess that while the outside of the journal is pretty, what she guided us to write inside the journal was truely amazing.
Faith & Friends Card
I used VersaMark to stamp on the dark brown card stock, then colored in the crosses with a glaze pen to add an extra highlight, added a matching ribbon, and voila! A quick and easy card.
If you are not familiar with VersaMark, you are missing out! VersaMark can be used with any of your stamps to give a watermark or tone-on-tone look. You can buy it at most craft stores for about $8. Stampin' Up! also sells VersaMark pens. I love VersaMark!
Happy Craftin'!
Me and My Family
One of my all-time favorite scrapbook layouts. This was 100% my creation. I used black as my contrast color and was amazed at how well it turned out! Even for a kids layout! The squares were made using two Creative Memories punches of slightly different sizes... Punch a small square, then punch again using a slightly larger square! (As always, turn your punch upside down to line it up before you punch.)
Happy Scrappin'!
Subscribe to:
Posts (Atom)

.jpg)
.jpg)